Snapping objects
When you move or draw an object, you can snap it to another object in a drawing. You can snap an object to various snap points on the target object. When you move the pointer close to a snap point, the snap point becomes highlighted, which identifies it as the pointer’s snapping target.
To snap an object to another object with greater precision, you first snap the pointer to a snap point in the object, and then snap the object to a snap point in the target object. For example, you can snap the pointer to the center of a rectangle, drag the rectangle by the center, and then snap the rectangle to the center of another rectangle.

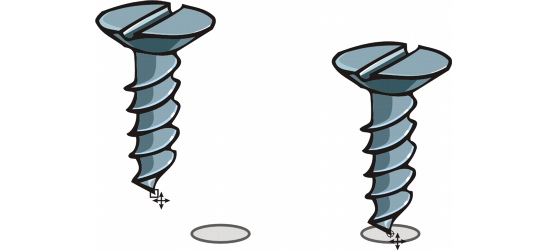
The pointer was snapped to an end node of the screw (left), and then the screw was dragged to snap to the center of an ellipse (right).
Snapping modes determine which snap points you can use in an object. The table below includes descriptions of all available snapping modes.
You can choose a number of snapping options. For example, you can disable some or all snapping modes to make the application run faster. You can also set a snapping threshold, which specifies the distance from the pointer at which a snap point becomes active. You can also turn snapping on and off.
To turn snapping on or off |
![]()
To snap objects |
|
3.
|
|
Drag the object close to the target object until the snap point on the target object becomes highlighted.
|
![]()
|
•
|
|
To snap an object as you draw it, drag in the drawing window until the snap point in the target object becomes highlighted.
|
To set snapping options |
|
2.
|
|
On the Snap to objects page of the Options dialog box, enable one or more of the mode check boxes.
|
|
You can also
|
|
|---|---|
|
Display or hide snapping mode indicators
|
Enable or disable the Show snap location marks check box.
|
|
Display or hide screen tips
|
Enable or disable the Screen tip check box.
|