Applying distortion effects
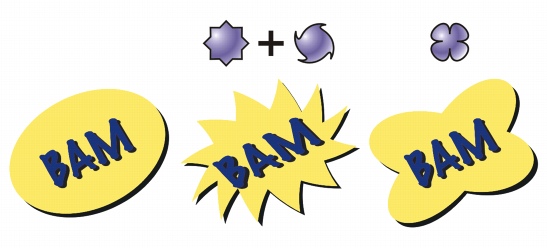
You can apply three types of distortion effects to shape objects.

From left to right: Original image; Zipper and Twister distortions applied; Pull distortion applied
After you distort an object, you can change the effect by altering the center of distortion. This point is identified by a diamond-shaped handle, around which a distortion appears. It is similar to a mathematical compass, where the pencil moves around a stationary point. You can place the center of distortion anywhere in the drawing window, or choose to center it in the middle of an object so that the distortion is distributed evenly and the shape of the object changes in relation to its center.
You can create an even more dramatic effect by applying a new distortion to an already distorted object. You don’t lose the effect of the original distortion if, for example, you apply a zipper distortion on top of a twister distortion. The CorelDRAW application also lets you remove and copy distortion effects.
To distort an object |
|
3.
|
|
Point to where you want to place the center of distortion, and drag until the object is the shape you want.
|
![]()
![]()

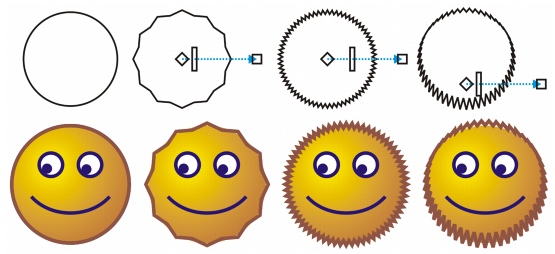
You can use the interactive vector controls to edit a distortion effect. Upper left: Zipper effect applied to circle. Upper right: Zipper effects with higher frequency (more spikes) applied. Bottom: Results of applying zipper effects.
To remove a distortion |
|
1.
|
|
Select a distorted object.
|
![]()
![]()
|
•
|
|
You can also remove a distortion from a selected object by clicking the Clear distortion button
|
To copy a distortion |
|
1.
|
|
Select the object to which you want to copy a distortion.
|
![]()
|
•
|
|
You can also use the Eyedropper tool
|